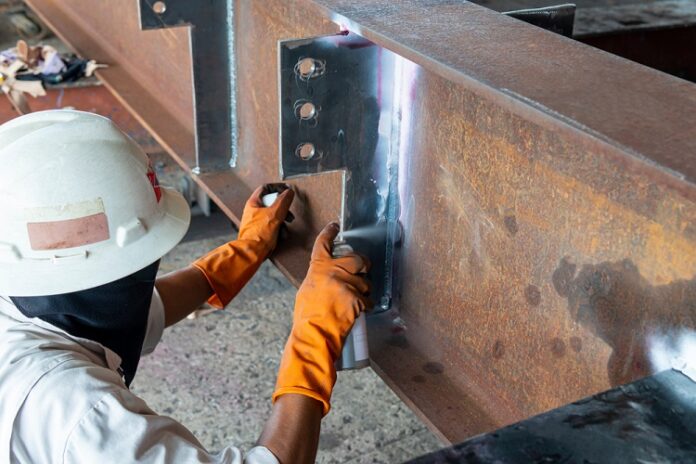
There are several non-destructive testing (NDT) techniques, liquid penetrant testing is one of them. Manufacturers and inspectors can identify flaws in a product, such as indents, hairline fractures, indents and other faults that might affect a material’s ability to function properly, using a non-destructive test. An excellent method of assessing materials without compromising their composition or integrity is non-destructive testing. A reasonably priced way to find any irregularities, flaws, or impairment to nonporous materials like ceramics, metals, and polymers is with liquid penetrant testing.
Table of Contents
How does it work?
Application of penetrant to a nonporous surface and utilizing a particular testing technique to see if excess penetrant exposes a material flaw is how the liquid penetrant testing process operates.
Step 1
Cleaning the material’s entire surface is the first step in performing a liquid penetrant inspection. The liquid penetrant test depends on the phenomenon of capillary action, or the liquid’s capacity to pass through capillary sized tunnels, so clearing away any debris or dust at the outset is crucial to prevent those regions from becoming obstructed. It’s also critical to use a lint-free, clean cloth to prevent adding more particles to the material that is under the test.
Step 2
The testing process starts with the application of the liquid penetrant after the material has been thoroughly cleaned. The liquid, which is typically red in color, can get into surface fractures and cracks, even ones that are invisible to the naked eye. The inspector has to figure out the penetration time, or how long it should be exposed to the liquid penetrant, after it has been applied. This period of time typically lasts 10 minutes, but it finally varies based on the kind of material and the extent of the flaw. A dwell time of five minutes or thirty minutes is an option.
Step 3
The material’s surface must be cleaned one more time in the following step. Once more, it’s crucial to use a fresh, lint-free, dry cloth at this point. Furthermore, you must not do something that could force the liquid penetrant out of any defects or cracks, including sprinkling cleaning solution directly onto the surface.
Step 4
After cleaning it for a second time, the material’s surface is treated with a developer solution, which is frequently a white colored one. After that, there is typically a 10-minute wait period before the developer starts working. The developer will extract any liquid penetrant that remains and show any surface fractures or cracks because of capillary action. White and Red are the most popular colors for penetrators and developers, due to their striking contrast. Nonetheless, certain penetrants have fluorescent pigments in them that, when left unprotected to UV light, would cause the material to glow.
Step 5
Inspectors inspect the material in the last step to determine whether or not the penetrant is leaking, which could indicate surface cracks, flaws, or breaks. They merely remove the remaining traces of developer and penetrant after evaluation.


